
We're about to upgrade Weebly. Please log out and check back in 15 minutes.
Site Planner
Welcome!
Congratulations on taking the leap to start your site!
Whether you are a beginner or a pro, Weebly has everything you need to plan, create, publish and grow your site, blog or online store.
Site Planner will help you think through your site and give you ideas and inspiration for how to best use Weebly to bring your vision to life. It’s full of tips, examples and step-by-step video tutorials that will guide you through the process of creating a high quality site that achieves your goals.
We are here to help you. You can return to Site Planner any time you need ideas and inspiration while creating your site. And, if you get stuck, you can reach us at support@weebly.com.
Have fun creating your site!
Site Goals
Getting clear on why you are starting your site and what you want to accomplish is an important first step to starting your site.
The number one reason why people don’t finish their site is because they don’t have a clear vision of what they want to create.
Don’t let that happen to you! Invest a few minutes to come up with a plan and it will be that much easier and rewarding to create a site that achieves your goals.
Take a step back and think through your main site goals and write them down.
Print my goals
I am starting a site for...
Examples: dog walking service | photography | non-profitMy site goals...
See examples
- Win new dog walking business
- Provide info about services & pricing
- Keep in touch with clients by providing dog care tips
- Showcase my best work
- Tell people about my approach & philosophy
- Allow people to book my photography services
- Educate the community on why this is important/needed
- Show the results of the program to date
- Fundraising & volunteer recruitment
1.
2.
3.
Now, build on that by thinking through what information you can include to support your goals. Try to be as specific as possible and write down all of your ideas.
Information I want to include on my site ...
See examples
- Complete list of my services & pricing
- Information about me, why I started the business
- What makes me different from other dog walking services
- Photos of happy dogs and customers
- Testimonials from my best clients
- Dog care tips
- A way to contact me
- Links to my social media
- High quality photos of my best work
- My story as an artist
- Info about my shows
- Info about my professional photography services
- A way to contact me
- Current state of technology skills for inner city youth
- Numbers and stats to tell the story
- Photos and hearing from the kids in their own words
- How people can help--how much we need to raise and how donations are used
- Information about volunteering with us
- About us - the story of the team and why we formed the non-profit
1.
2.
3.
Look At Other Sites
At this point you should have a pretty solid idea of what you want to include on your site.
Now is a great time to get some outside perspective and polish your plan.
Looking at other sites with similar goals can be a great way to spark additional ideas. Do a quick search and find at least 3 examples. Look through each site and take stock of what you like and don’t like and use that to refine and improve your Site Plan.
Now you’ve got your plan locked down it’s time to start assembling the information you need and move on to organizing your site.
Organizing Pages
Now that you’ve come up with your Site Goals it’s time to pick your pages and organize your information.
Start with 3-5 Core Pages
We recommend starting your site with 3-5 core pages. Begin with the most important pages first, you can always add more later (there’s no limit) and most people continue to grow and evolve their site over time.
Core pages provide the main navigation menu for your site and should allow visitors to easily find what they are looking for. Try to keep them to 6 or less so that your site is clean and easy to navigate.
 An example of a well organized Nav Menu.
Add sub-pages underneath core pages as needed to further break down and organize your information into digestible chunks.
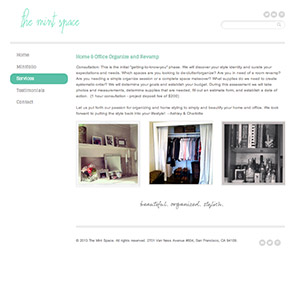
Common Page Types
Here are a few of the most common types of pages and the information that typically goes on them to use as a starting point.
Keep in mind that you can create any page types you like and get creative with the page names based on the unique goals for your site. The possibilities are endless.
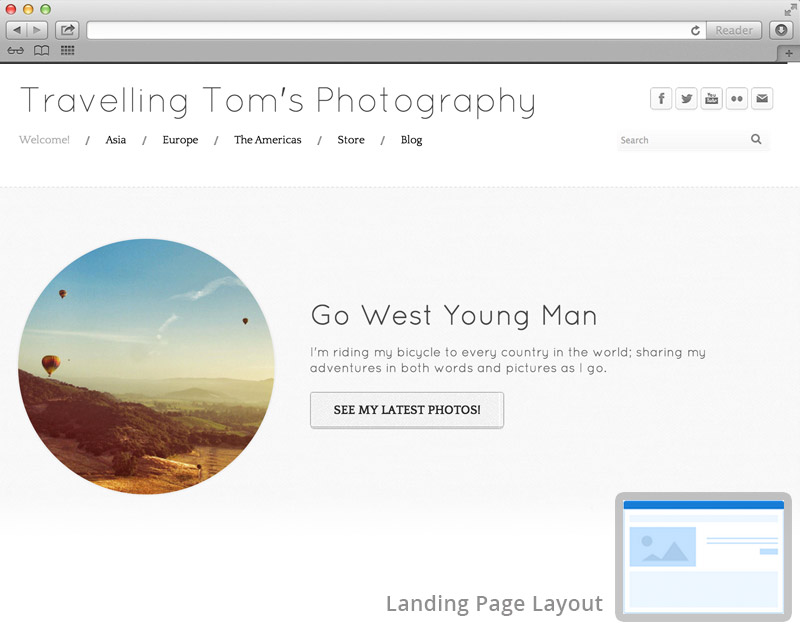
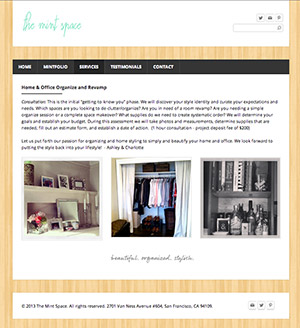
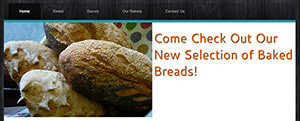
- This is the first page that visitors see when they arrive at your site - it’s where you make your first impression.
- Tell what your site is about, ideally in 50 words or less. Make sure anyone who visits your site will quickly understand what it’s about without having to do a lot of reading.
- Think about who will be visiting your site (e.g. customers, friends, family, potential employers, new prospects, etc.) and put yourself in their shoes. What will they want to know? Make sure they can quickly find that information from this page. Resist the urge to put everything on this page and let visitors explore other areas of your site from your navigation menu.
- Try to include a few relevant high quality photos to create a visually appealing design and make your site stand out - if you don’t have any available, see if you can tap a friend that’s into photography to help get you started.
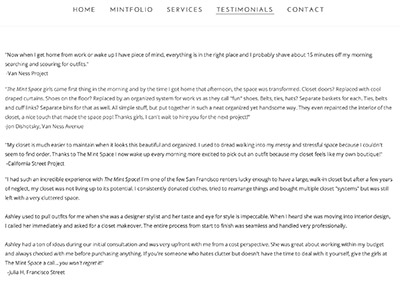
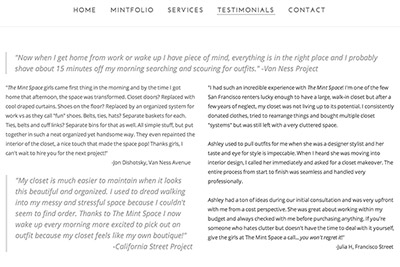
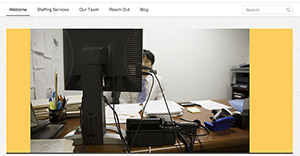
- Typically one of the most visited pages on a site. People are curious and want to learn about you - don’t be shy.
- Tell your story, ideally in 300 words or less. Some questions to consider on this page: who are you, where are you, why are you are doing what you are doing, how did you get here and anything else you want people to know.
- Include a high quality photo of yourself or something relevant or meaningful to you and your site.
- Every site should have a way for visitors to quickly and easily get in touch with you. Consider including a contact form where you designate what information you want the visitor to provide so you can get back to them with a helpful response.
- Add a map if you have a physical location so people can find you.
- If you want to get creative with the navigation name for this page consider: ‘Talk to me’, ‘Say hello’, ‘Get in touch’ in addition to the more basic ‘Contact me’.
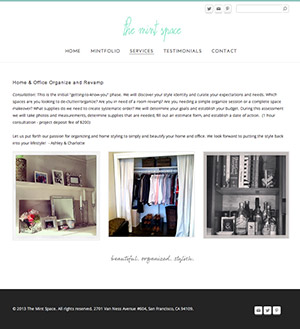
- A painter might make this a gallery page with lots of high quality photos of their work in a beautiful slideshow format.
- A dog walking service could provide information about their services and pricing with a clear way for visitors to schedule a walk such as a button linking to the contact page.
- A blog is a great way to share your knowledge, position yourself as an expert on a topic or provide an area on your site where you post new information regularly. Blogs give visitors a reason to come back and an easy way to see what’s new. You can start a site that is only a blog (in which case your homepage is your blog) or you can add a blog as a page on your site.
- If you are trying to grow the number of people visiting your site, a blog can be a great way to get more traffic from search engines. The more relevant information you have on a topic, the more likely search engines will be to show your site as a result for relevant keywords.
- So what should your blog be about? Some examples: A dog walking service could blog about tips for taking care of pets, a pottery maker could blog about upcoming art shows, projects they are working on and general musings on art, a real estate agent could position herself as an expert on a neighborhood by blogging about the area. Get creative based on your unique goals and expertise to think about how a blog could support your site.
Once you’ve decided which pages you want to include on your site, add them to your Site Goals.
Laying Out Pages
There’s more to organizing your site than how the pages are arranged. The arrangement of the information itself also needs thought. A good layout will make your site attractive and “user-friendly” for your visitors.
Page Layouts
Use the page layout options to define the way your theme looks on a given page so that it matches well with the information you want to display.
The layout of a page can be changed as many times as needed, and will not change or delete the information on the page, so if you don’t like the layout you’ve chose, you can switch over to another one whenever you want.
Examples of Page Layouts
Organizing information with multiple column layouts
If you’ve played around in the Site Creator you may have noticed that if you drag multiple building blocks onto the page, they will stack one on top of each other vertically.
Before Using a Multi Column Layout
After Applying a Multi Column Layout
Use the multiple columns building block to create a horizontal layout of elements that are side by side. Multiple column layouts often create a more balanced and polished design so definitely play around and experiment to see what looks the best.
Tips and tricks for creating great page layouts
If you have a lot of information that you want to include on a single page, experiment with layouts to find the best way to organize and present it to your visitors.
- Bullets & Numbered Lists - are a great way to break down large amounts of information into easily digestible chunks
- Divider/Spacing - create visual breaks and spacing between different sections of information to make your pages more readable
- Font Sizing - use descriptive headings in a slightly larger font size to divide your information into skimmable chunks
- Photos - use photos to help break up large areas of text either using a Paragraph and Picture or Multiple Columns building block
Personalizing Your Theme
The theme you choose sets the tone for the overall look and feel of your site design.
Keep in mind that you can easily change the theme of your site at any time to give it a different look. A theme can dramatically change the design of your site and you may want to “try on” a few different themes to experiment and see what you like best.
Changing your theme will not affect, change or delete the information you have added to the body of your site in any way and you can always go back to your original selection so don’t be afraid to switch things up.
One site three ways:
Once you’ve chosen the right theme for your site, follow these tips to personalize it and make it uniquely your own.
Every theme comes with its own default selection for the font face, color and size that automatically applies to any text that you add to your site. These default settings can be quickly changed to allow you to experiment with different font styles to create the right look for your site.
Use the Paragraph Text settings to control the fonts for the majority of text on your site. The Title Text settings control the font for your site title only.
A few suggestions on using fonts to create a high quality design:
- Choose basic fonts for all of your Paragraph Text (as that makes it easier to read)
- Stick to black and grey fonts (or white if your site has a black background) for all of your Paragraph Text
- Save fancier, more stylized fonts for your site Title
- Use colored fonts sparingly (as they can compete with your design and the information you are presenting)
- Create a consistent design feel by sticking with a limited set of fonts, sizes and styles across all of your pages
As noted above, your site has a Title whose fonts can be made more stylized and unique via Design Options. But you can take this customization a step further by replacing the Site Title with your own logo image.
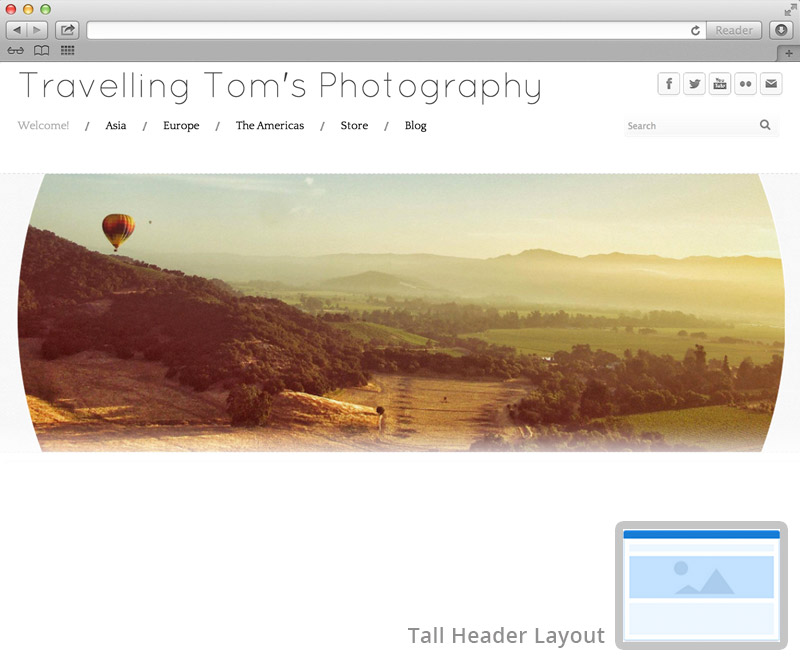
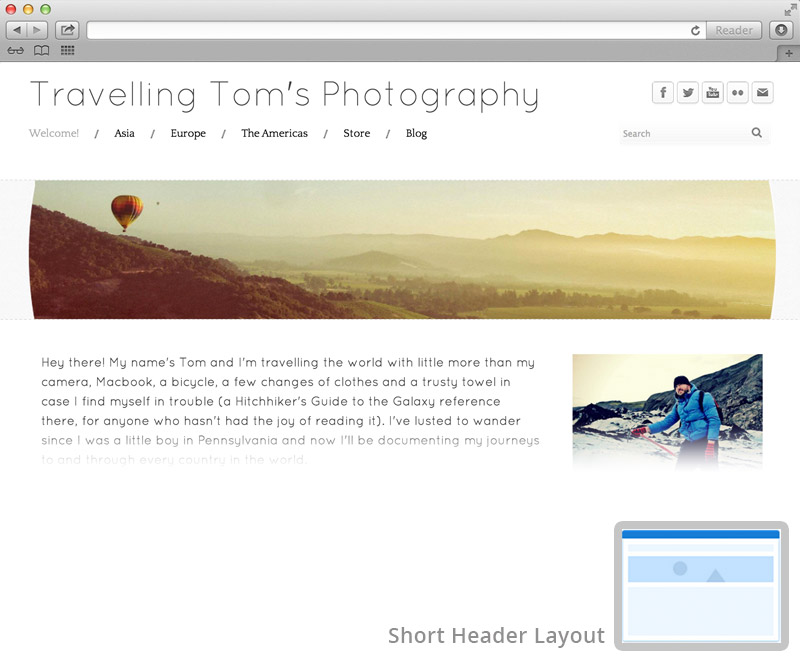
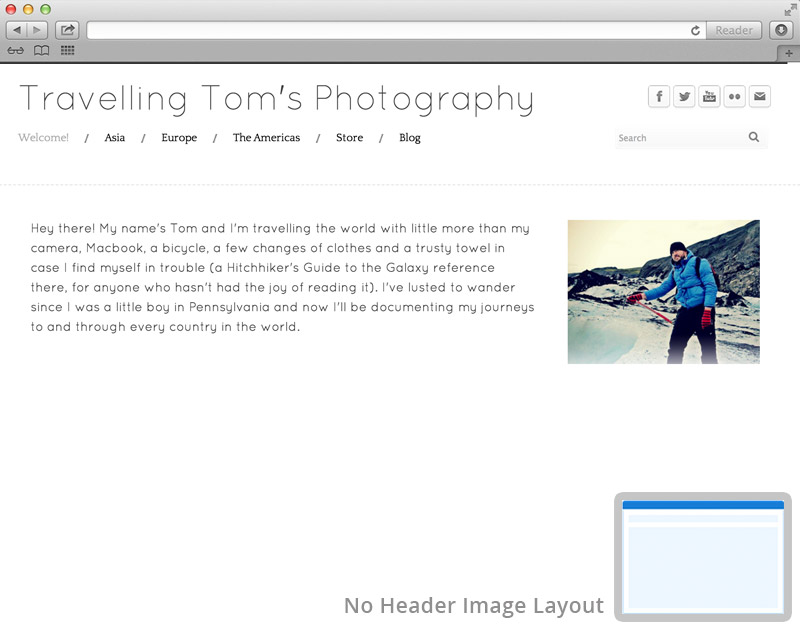
Each theme includes a default banner image. We recommend that you replace this image with something that is unique to your site.
Here are some tips to keep in mind when creating your banner:
- Start with high quality original photos that are in focus with good lighting. If you don’t have any photos you want to use, enlist a photographer friend to help you take some or check out our photo library.
- Choose horizontal photos when possible as they display best in this area.
- If your photos are high quality you can use our editor to blow them up so that they fill the entire Banner Image Space. Make sure they do not look grainy.
- If you don’t have horizontal photos or if your photos start to look grainy when you blow them up then consider creating a collage using multiple photos instead
Once you’ve finalized your Banner Image you can apply the same banner image across all the pages on your site that use the same Layout or you can create a different banner image for each page.
Examples of Good Banners

Examples of Bad Banners

In the upper right corner of every theme there are four icons representing Facebook, Twitter, LinkedIn and a blog RSS feed. These buttons appear on every page of your site, much like the Site Title/Logo.
Use these buttons to easily link visitors to your profiles for these services or the many others that are available. You’ll need to add your own URLs for each of your pages in order for these to work. Be sure to delete any of the profiles that you don’t want to use to avoid having broken links on your site.
You can link to a wide variety of social profiles using social icons.
Amazing Photos
High quality photos are an important ingredient to creating a unique look for your site.
If you don’t have great photos to include, consider tapping a friend who’s into photography to help you get some great original shots. You can also browse our photography library to find images for your site.
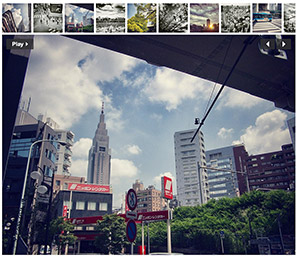
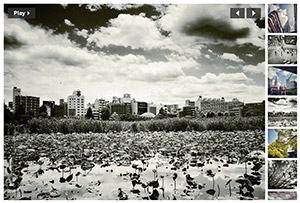
Galleries & Slideshows
When you have a single photo to include on a page then our individual picture element is the way to go. But when it comes to organizing large photo sets you’ll definitely want to take advantage of Galleries and Slideshows that let you easily create an impressive photo display.
Types of Slideshow layouts
 Double Row of Thumbnails
 Numbers at the Bottom
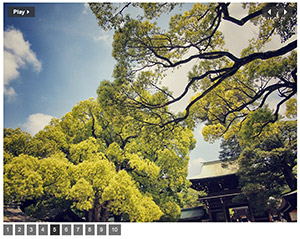
 Simple Slideshow
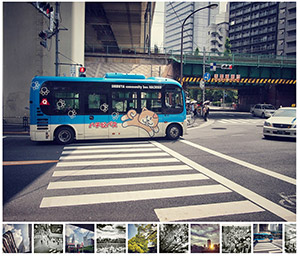 Thumbnails at the Bottom
 Thumbnails at the Top
 Thumbnails to the Right
Use the Slideshow layout options to select the way your photos display so that it works with the overall design of your page.
Choosing A Site Address
Your site address (aka domain) is where people find your site online. And, it is just as important to your branding as the name of your business or organization so you’ll want to put some thought into finding the right address for your site.
Tips for Choosing Your Site Address
The simplest way for a visitor to reach your site is by typing your domain name directly into their browser’s address bar. Make this easier for them by buying a domain name that is short and to the point. Try not to go over 20 characters, and if you can keep it even shorter then all the better.
Your domain name is essentially the “name” of your site. That name should be easy to both remember and spell. Are you creating a portfolio or personal site? Use your first and last name as the address. Creating a site for your business? Use the name of your business.
Sometimes it’s not possible to follow the second tip because the name you want is already taken. As an example, let’s say you own a bakery named Brooke’s Bakery. The obvious choice for your domain name is brookesbakery.com.
What if there’s another Brooke’s Bakery out there in the world and they already own the domain? Well, you could buy brookes-bakery.com. But you likely see the problem here -- if you give someone your address there’s still a chance later on they’re just going to enter brookesbakery.com and not think to include the hyphen. And let’s not even talk about “brookesbakery2” or anything along those lines.
One option would be to buy brookesbakery.net instead. But what if that’s also taken?
What if our bakery example was focused on a specific type of baked good? Brookesbreads.com or brookespies.com would be good alternatives to the company.
We’re not saying this simply because it means you’re spending more money. Search engines like Google actually look at the domain’s length of registration to help judge the legitimacy of your site. A longer term registration looks more legitimate and makes them more likely to rank you highly. It won’t necessarily mean a huge boost, but every little bit helps.
And when you register a domain name it becomes your property for the length of the registration (1, 2, 5 or 10 years). Once that registration period is over you can renew the domain yourself to maintain ownership or let it expire so that someone else can purchase it. Registering the domain name for multiple years means you've secured it, and you don’t have to worry about expiration and renewal until much later down the line.
Keep in mind that these tips are only meant to be a guide, they’re not rules that have been set in stone. If you have a domain name in mind you really like and that you feel is the right fit for you then go for it!
Site Address Options
There are three options to choose from when you are ready to publish your site:
1) Use a Weebly subdomain for free (e.g. yoursite.weebly.com)
This is a great way to go if you don’t already own an address and your are not ready to buy one. You can check availability for the address you want (to make sure someone else isn’t already using it) and/or change your address at anytime in the Settings area.
2) Get your own custom domain name (e.g. yoursite.com)
A custom site address gives your site a more professional look. You can even get a matching email at your site address like email@yoursite.com.
If you already know the address you’d like, the first step is to check to see if it’s available meaning that it has not already been registered by someone else. If it is, then you can buy it and we will automatically set it up to work with your Weebly site. Your site will be visible at your new domain name within minutes after you publish.
If the address you want is already taken, it’s time to brainstorm some alternative ideas. Review the tips above to get you started.
If you are upgrading from a subdomain of weebly.com to your own domain, traffic to your old address willl be automatically forwarded to your new one.
3) Setup a domain you already own with your Weebly site
If you want to use a domain that you purchased elsewhere you’re more than welcome to do so. You just need to alter a few records with your domain host. Learn how to do that here.
Publishing
What is Publishing?
Publishing puts your site out on the Internet for everyone to see. Once you Publish, anyone who types your address into their browser can visit your site. Whenever you make additional changes or updates to your site, you’ll need to Publish again so that visitors will see the latest edition of your site.
Publish your site by clicking on the orange Publish button in the upper right hand corner of the Site Creator. You can’t miss it!
When you Publish for the first time you’ll be asked to choose an address for your site. You can learn more about site address options here.
When to Publish
You can publish your site whenever you are ready. We recommend Publishing your site early and often as you are creating it so that you can see how it will look for your visitors. Think of Publishing as something you’ll do over and over again as you continue to develop your site rather than a one time event.
If you are just starting your site, don’t need to worry about visitors getting to it before you are ready for them. Just because your site is Published and available on the Internet does not mean that people will immediately find it (unless you tell them about it).
Publishing vs. Saving
Be sure not to confuse Publishing with saving your work. Publishing and saving are actually two different things.
Anytime you make changes to your site, your work is saved automatically in your Weebly account. If you don’t Publish those changes, your visitors will not be able to see them on your site. This gives you the flexibility to make updates at your own pace without having your site visitors see your work in progress. Just make sure to remember to Publish when you are ready.
Grow Visitors
Get the word out
Once you’ve published your site, it’s time to start spreading the word to grow your visitors. Email your customers, friends and family; mention your site in conversation and use Facebook and Twitter to bring visitors to your site. Add your site address to your marketing materials—on business cards, as a link from your email signature, to brochures, signage, and anywhere else you can think of.
Track and measure your growth from the site stats dashboard
From your stats dashboard you can see how many unique visitors have come to your site each day and find out how many pages they’ve viewed.
If you upgrade to a paid account, you’ll also be able to see even more details about who’s visiting your site and how they found you including—which pages they are visiting, what search terms they used to find you and which sites are referring people to you.
Use site stats to understand how the things you are doing to promote your site--adding a blog post, sending an email or posting to Facebook--are impacting your visitor numbers. Then, build on what’s working best and keep track of how your traffic grows over time.
Your sites stats dashboard can be accessed from the home screen:
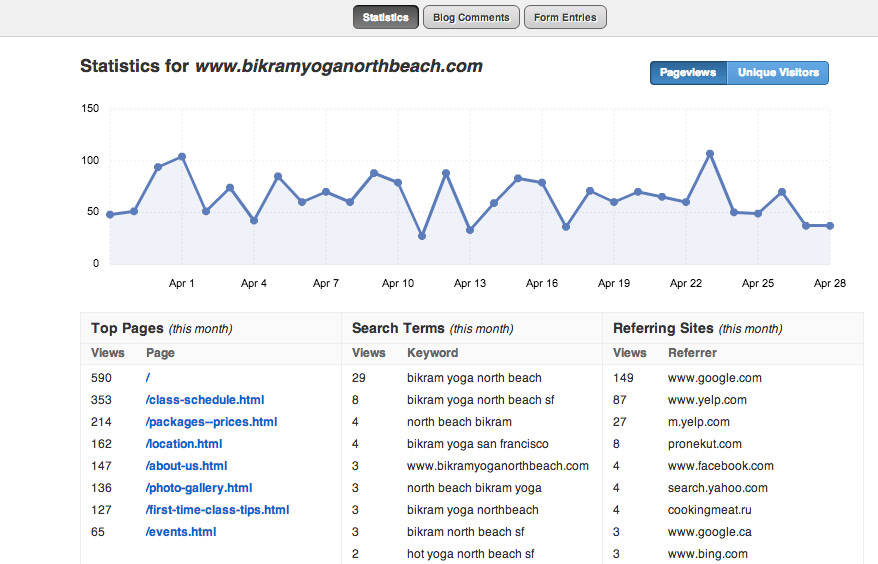
What do all these stats mean exactly?
Pageviews: The number of pages visitors viewed on a given day. One visitor may visit three, ten, twenty, or however many pages.
Unique Visitors: The number of individual visitors who came to the site. The unique visitor number should always be smaller than the pageviews number simply because one person can visit multiple pages. So for example, if you had 25 unique visitors and 100 pageviews, that means that on average each visitor viewed 4 pages.
Top Pages: The pages on your site with the most visits. The page called “/” is the home page and will typically get the most visits.
Search Terms: This shows which search terms visitors have entered in Google, Bing and Yahoo! to find your site.
Referring Sites: If a visitor clicked on a link from another site to reach your site then they have been “referred” to your own site by this other site. Having more in-bound links pointing to your site helps you rank better with search engines.
Tips to help you get your site highly ranked by search engines
Search engines like Google, Yahoo! and Bing are one of the most powerful ways to bring visitors to your site.
While we make sure that search engines can easily find your site, there’s still a lot more you can and should do on your own to help make your site even more attractive and improve your rankings.
Check out the following articles to learn more and get started:
- Get an overview of how Search Engine Optimization (SEO) works.
- See step-by-step, how to setup your site description and choose relevant keywords. Make sure to do this for each of your individual pages in addition to your site overall.
- Learn how to verify your site with Google.
Start a blog
A blog is a great way to regularly add high-quality information to your site, which has two important benefits. First, it gives your visitors a reason to return often. Second, it’s likely to make your site more attractive to search engines.
If you have some expertise on a topic that’s relevant to your site, then you should consider starting a blog. Even if you don’t have a lot of expertise on a given subject, give some thought to how you could curate and highlight information that will be of interest to your visitors.
For example, a dog walking service could blog about pet care, a ukulele maker could blog about his techniques, an art teacher could blog about craft projects for kids.
If you do decide to start a blog, create a schedule to update it regularly—whether that’s every other day, once a week or once a month. Decide what’s achievable for you and stick to it in order to see the most benefit.
Also, if you use an iPhone or Android, be sure to download our apps so you can post and manage your blog while on the go.


 Advanced Properties
 Setup passed!
  Pending Setup


